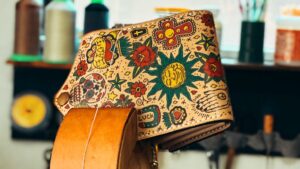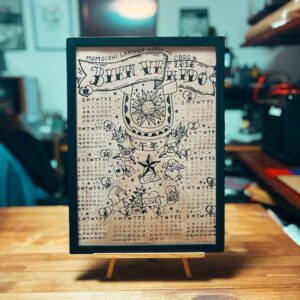
作り始めるとき、最初に決めるのはメインのモチーフだ。
スカルなのか、パンサーなのか、薔薇なのか。まずそれを決めて、革の上に大まかに配置する。そこからが面白い。隙間をどう埋めるか、その日の気分で決める。ノーチカルスターを入れようか、スワローにしようか、小さな星を散らそうか。決まったルールはない。その日の自分が感じるままに描いていく。
オーダーの場合は、隙間に入れるモチーフを指定してもらうこともできる。「ここにこのモチーフを入れてほしい」という希望があれば、それを組み込みながら全体のバランスを整えていく。
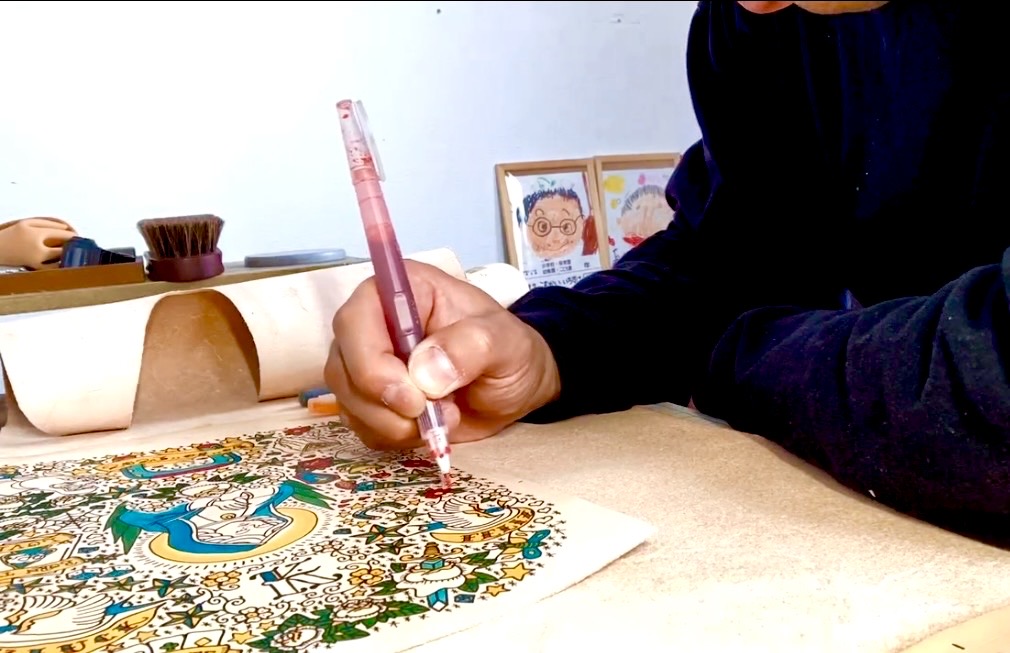
デザインが決まったら、革専用の染料で色を入れていく。
一色ずつ丁寧に染めて、乾かして、また次の色へ。タトゥーアートの鮮やかな色彩を革の上で再現するには、時間がかかる。染料が乾いたら、ワックスを塗り込む。保湿、撥水、汚れ防止——革を長く使ってもらうための仕上げだ。
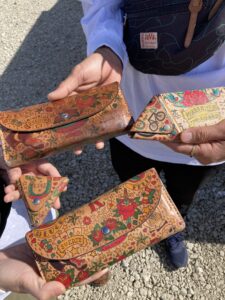
絵が完成したら、いよいよ革小物としての組み立てに入る。
型通りに革を切り出して、パーツを組み合わせて、手縫いで縫製する。最後にコバ——革の断面を磨いて滑らかに仕上げる。ここまで来てようやく一つの作品が完成する。
同じものは二度と作れない。デザインも、縫い目も、コバの磨き方も、全部その一点だけのものだ。
Every piece starts with one decision: the main motif.
A skull, a panther, a rose — something to anchor the design. I place it on the leather roughly, then figure out the rest as I go. The gaps between motifs are where it gets interesting. A nautical star here, a swallow there, a scatter of small stars to fill the space. No fixed rules. Whatever feels right that day.
For custom orders, customers can specify what goes in those gaps too. “I want this motif here” — I’ll work it in and balance the overall composition around it.
Once the design is set, I start applying color with leather-specific dyes.
One color at a time, let it dry, move to the next. Recreating the vivid palette of tattoo art on leather takes time. After the dyes are dry, I work in wax — for moisture, water resistance, and protection against dirt. The leather needs to last.
When the painting is finished, the construction begins.
I cut the leather to pattern, assemble the parts, and sew everything by hand. Then comes the edge finishing — burnishing the cut edges of the leather until they’re smooth. That’s when the piece is finally done.
No two are ever the same. The design, the stitching, the way the edges are finished — everything belongs to that one piece alone.